
Table of Contents
Newsletters are an essential part of eCommerce marketing. With this you have a list of your customer’s emails, you can easily inform them about new products, specials, promos, with updates and news, etc on your Magento store.
To understand the process of newsletter in Magento2. Let’s go through the it
Before you start creating newsletters and sending them to your list of subscribers, you need to configure some settings for your site.
Follow these steps to configure newsletters in Magento 2:
Step 1: Configure Newsletter Subscription Options
Before you start sending newsletters to your customers, we will check the options of how users can subscribe to the Newsletter.
There are 2 options of how users can subscribe to your Newsletters.
- First one is that they fill the subscription field with their email.
- Second one is that they fill the subscription field with their email + confirm the subscription from their inbox (it is called double-opt in). This method reduces the risk that your customers consider your newsletter as spam because they can think twice before actually subscribing.
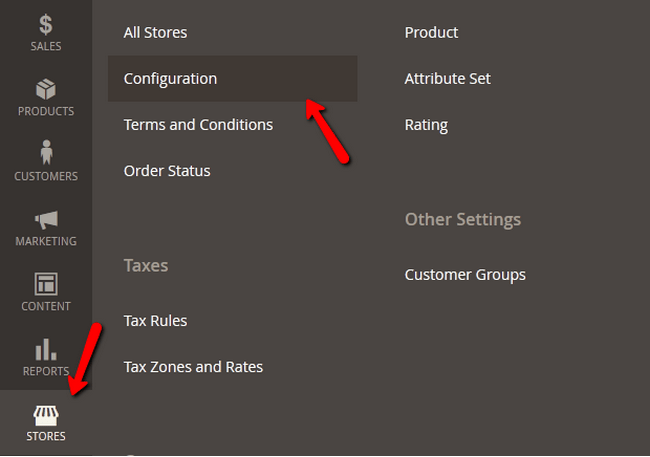
To access Newsletter Settings, you need to enter your admin panel. Then in the column on the left you select Stores – > Configuration (under Settings tab).
- Then click to expand Customers tab and select Newsletter.
Enable newsletters on your store in General Options. Expand the General Options section and select Yes Enabled field to enable the newsletter.

Click on the Save Config and refresh the Configuration and Page Cache afterwards if needed. Newsletter is enabled.
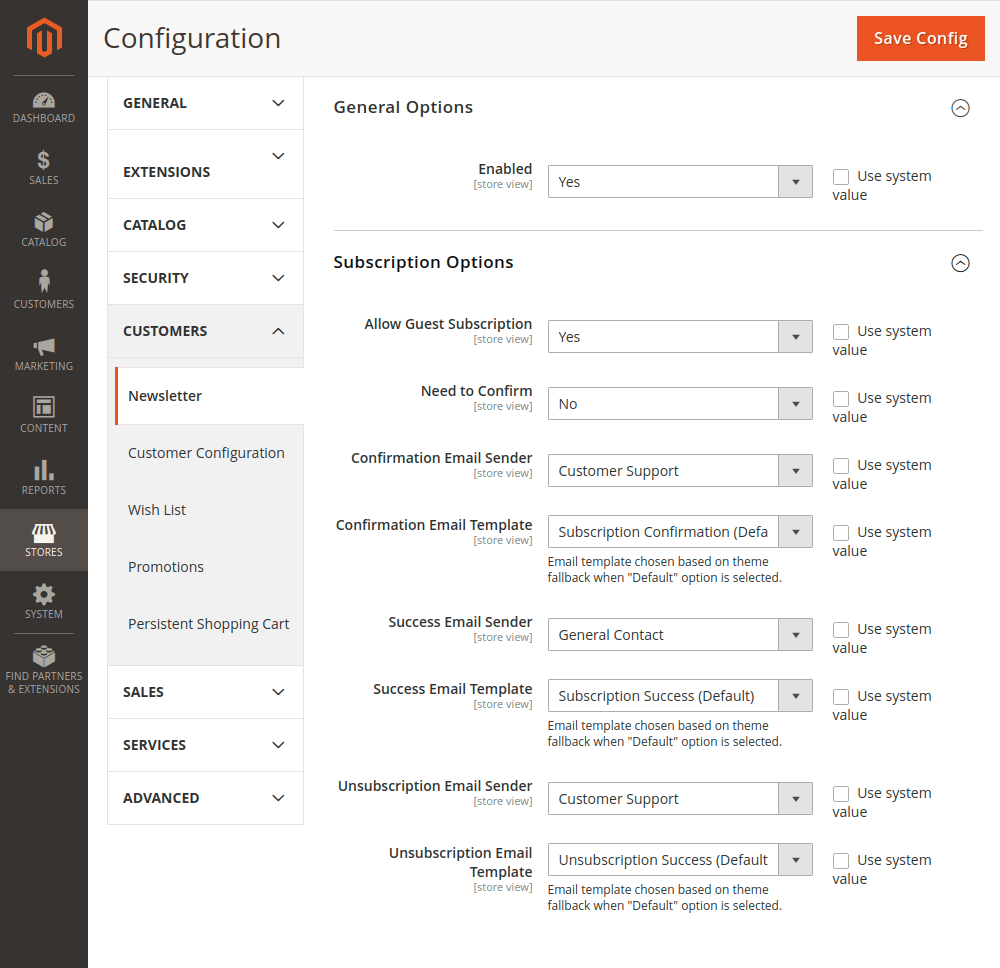
3. If you would like to give your potential subscribers a possibility to think twice before actually subscribing, you need to change Need to confirm field to Yes. Choose whether the newsletter subscription Needs to be Confirmed by the user. This option is to prevent users from being subscribed to a newsletter without their confirmation.
4. Set Allows Guest Subscription option to Yes, if you want unregistered users to be able to subscribe to your newsletter.
5. Choose the Confirmation Email Sender and Confirmation Email Template to set store contact and the email template that will appear in the email about the newsletter confirmation.
6. Success Email Sender and Success Email Template define the store contact and email template you’d like to use in the email about a successful newsletter subscription.
7. Unsubscription Email Sender and Unsubscription Email Template correspondingly determine the store contact and email template used in a reply email to those who request to end their newsletter subscription.
Once all of these options are set, you’re ready to move to the next step — add a new newsletter template.
Step 2: List of Subscribers
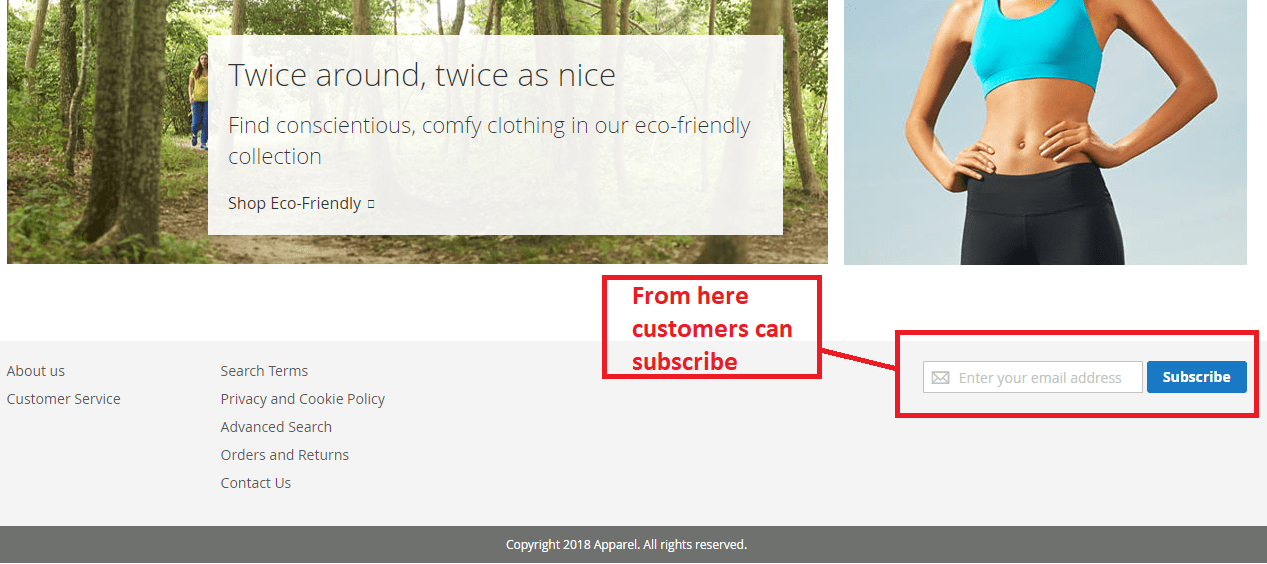
The customers can subscribe to the newsletter from the frontend. The newsletter subscribe option by defaultly present in the footer as shown below:
The customers subscribed from the above option will be listed in the admin Panel. In Marketing -> Newsletter Subscribers
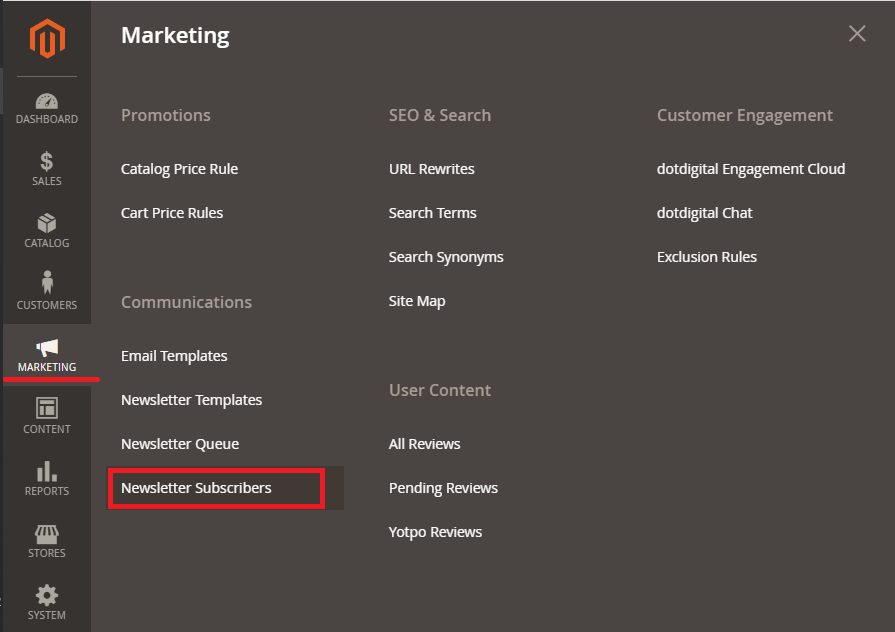
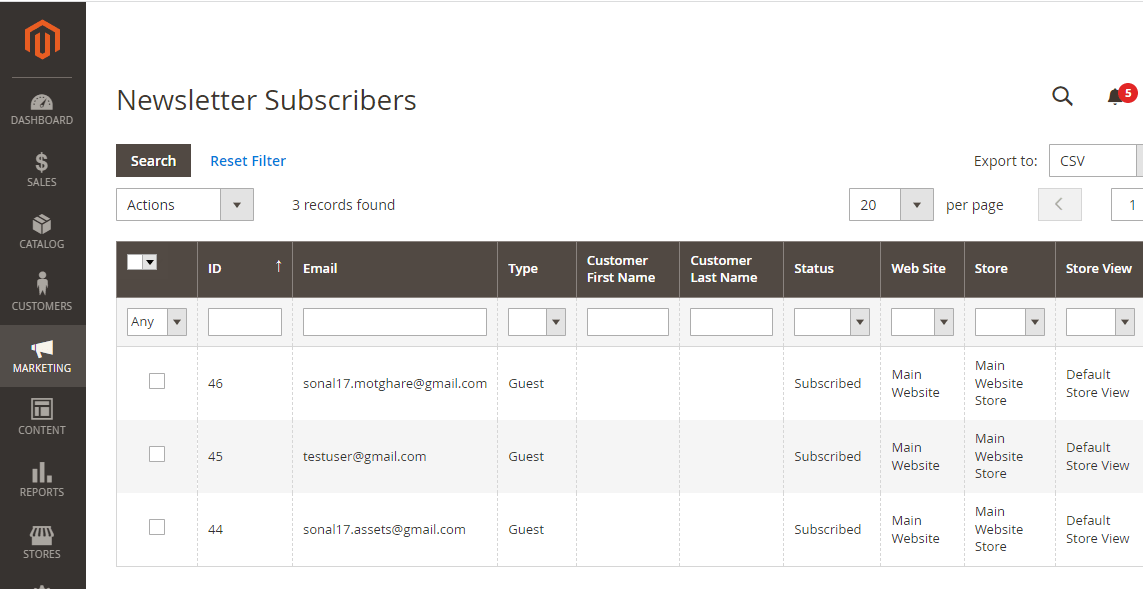
Click on the Newsletter Subscribes and you will the list of the subscribers in the below:
Step 3: Create Newsletter Template
To create a new Newsletter Template you will first have to navigate to the Marketing → Newsletter Template section from your main admin dashboard.
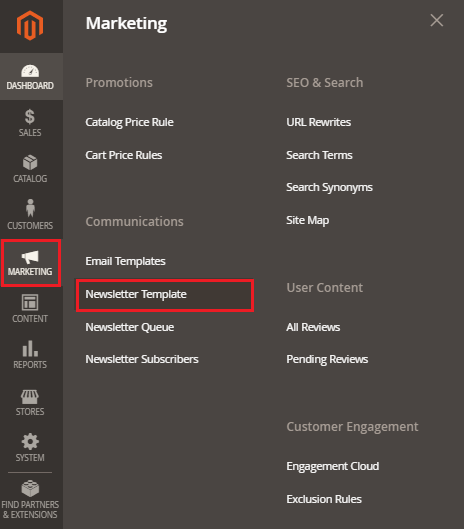
1. Go to Admin Panel > Marketing > Communications > Newsletter Templates and press the Add New Template button.
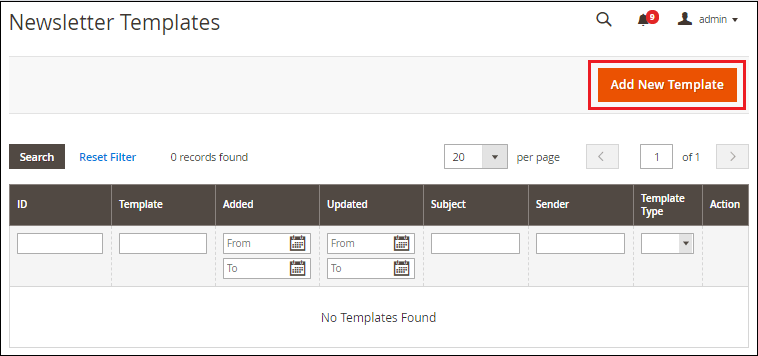
It will show some settings related to the newsletter template. Fill up all the required fields and click on the Save Template button, as shown in the below screenshot.
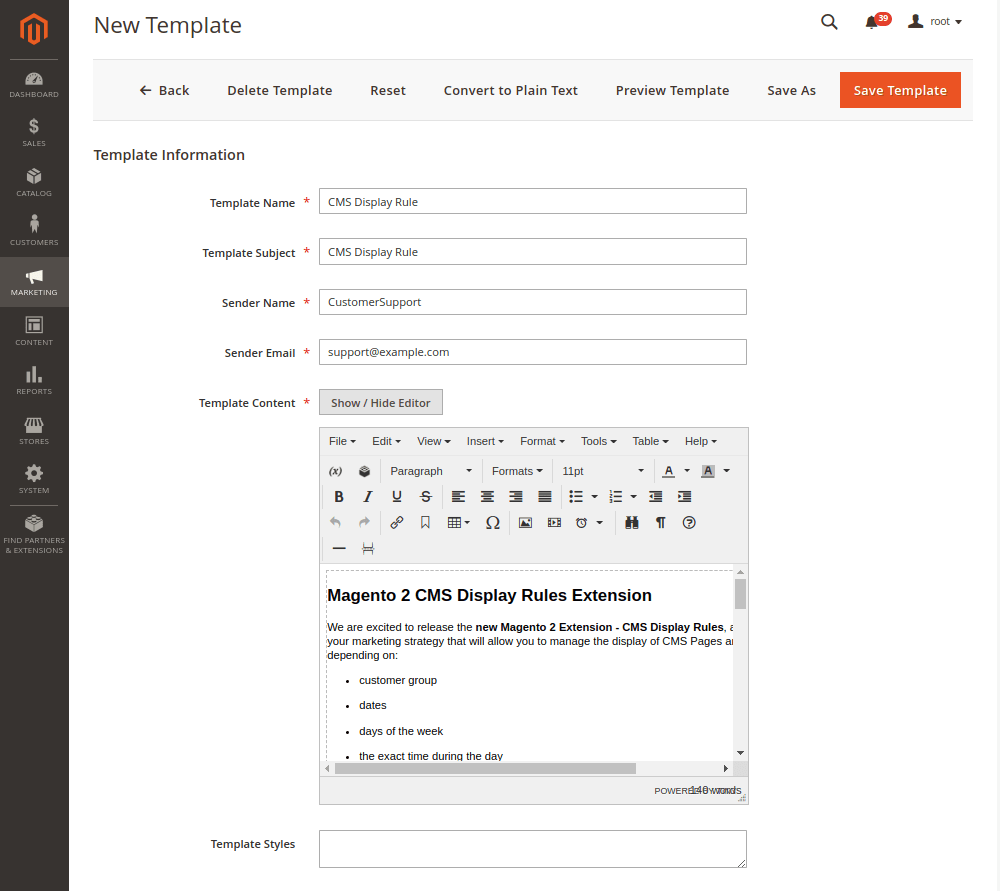
2. Enter a Newsletter Template Name and Subject.
3. Set the Sender Name and Sender Email subscribers will receive a newsletter from.
4. Enter Template Content. You can use the WYSIWYG (What-you-see-is-what-you-get) editor for this if you’re more comfortable working with HTML.
This part it is totally up to you. You can write whatever you want to deliver to your subscribers and add images. By default you have Follow this link to unsubscribe option. I advise you to keep it because sometimes subscribers get angry when they are receiving emails they cannot unsubscribe from.
5. Set the Template Styles to design your newsletter. This is for formatting your newsletter content. Template styles are done by the CSS team experts because some sort of CSS code is applied here.
6. Click on the Preview Template button on the top right corner near the Save Template to preview the newsletter. Then you can easily do the required improvisations if you need to.
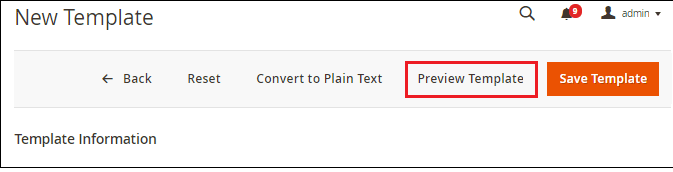
You can also use Convert to Plain Text button to see how your message looks in Plain-text mode (there is an option “open as a plain text” in most of email web services, so you need to check on this too).
When your template is done, press the Save Template button. Then you are redirected to the list of your templates.
Newsletter Template is created successfully. Now, it is ready to be sent to your customers or subscribers.
You can duplicate your current template by pressing Save As and changing its name. It can save you time when you need to send many newsletters with small differences.
Step 4: Send Newsletter Template
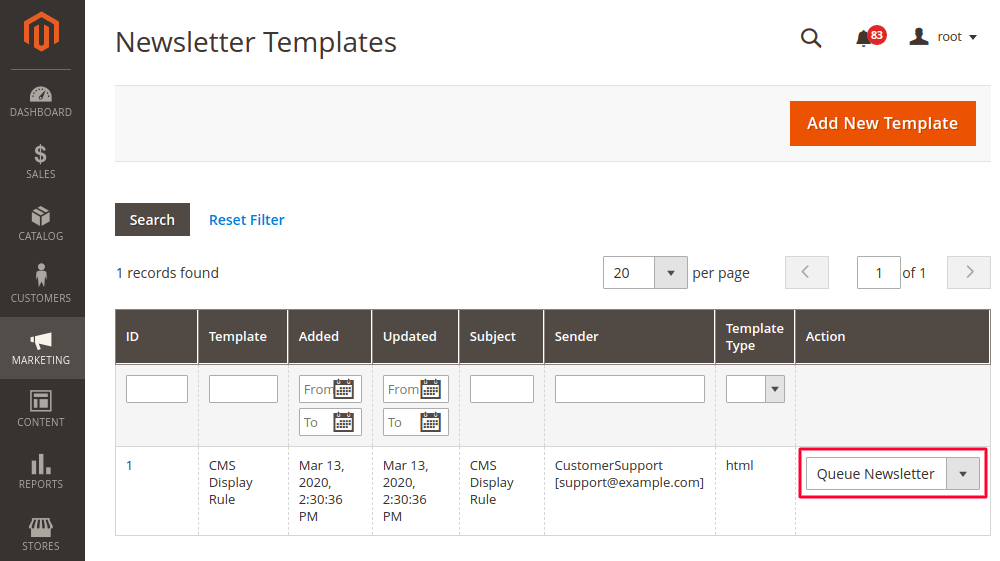
Once you Save the Newsletter Template, you are automatically directed to the Newsletter management page. In order to start sending newsletters, you need to choose the Queue Newsletter from the Action dropdown.
You will be directed to the queue where you can click on the calendar icon next to Queue Date Start to setup the time the newsletter will be sent.
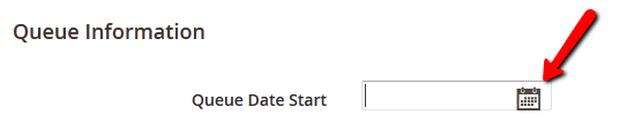
All you need to do on this page is set the Queue Date Start and Save the Newsletter since all other fields are already filled in.
It is very convenient to have all the newsletter information on one page and be able to change something if you need to.
Step 5: Check Newsletter Report
If you think there are issues with your Newsletters or your customers are complaining that some of them haven’t received their emails, you can check for issues in the report located in Reports → Newsletter Problems Report.
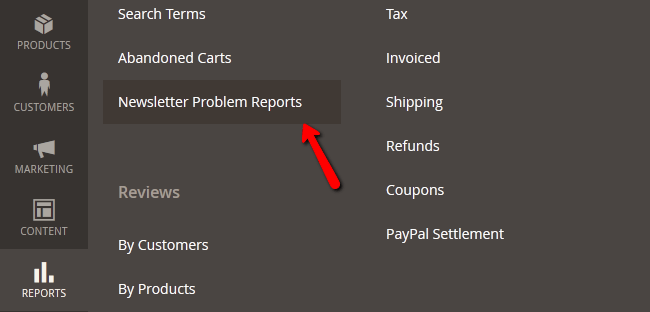
Here you will be able to see a detailed report with date/time and exact error number/text for the mails that have failed to send.
Congratulations, you can now fully manage the Newsletter section of your Store and provide your customers with the latest news and promotions available.
Step 6: Send Customers Subscription
Except for configuring, creating and sending newsletter templates, Magento allows you to manage the newsletter subscribers. You are able to either subscribe or unsubscribe them from your newsletter.
So, there are 2 ways you can manage your newsletter subscribers.
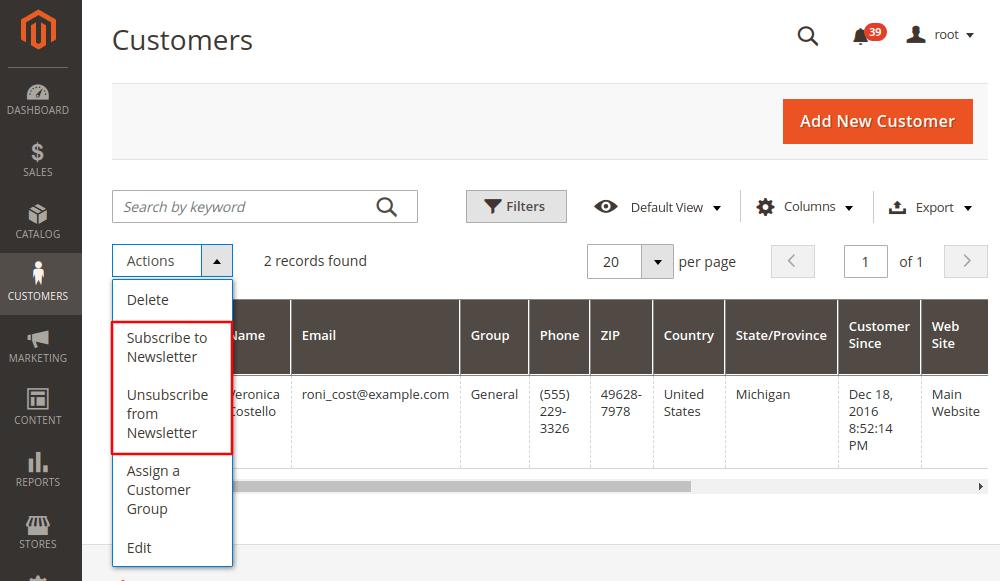
- Go to Customers > All Customers, check the customers you’d like to Subscribe or Unsubscribe from your Newsletter and choose the corresponding option from the Actions dropdown.
All of the selected customers will be automatically subscribed or unsubscribed.
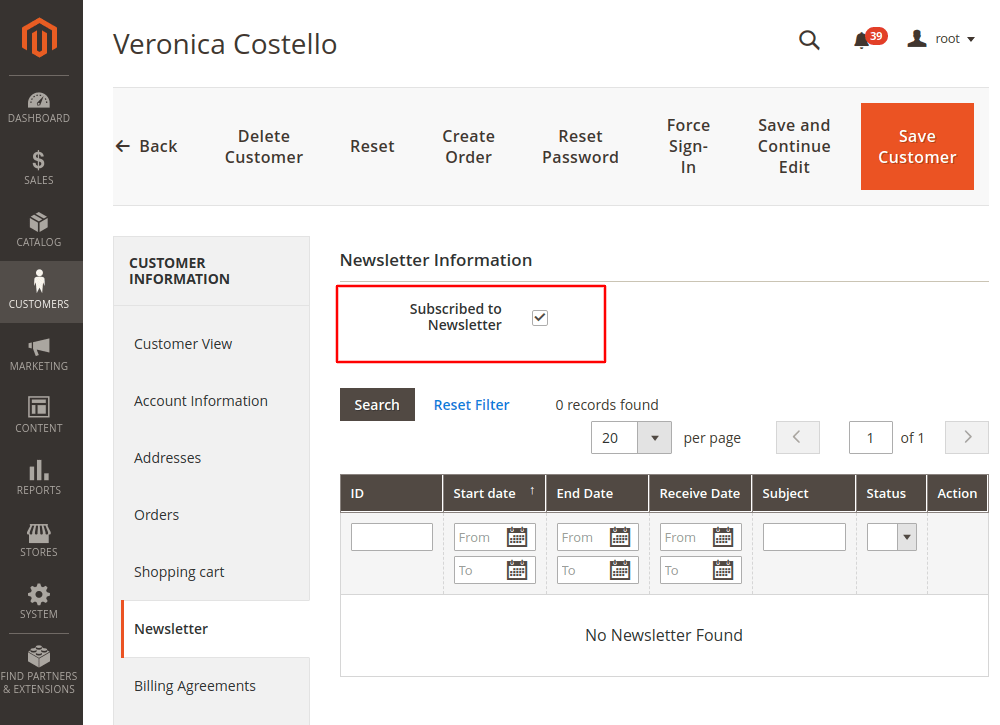
- Go to Customers > All Customers and choose the customer you want to subscribe to a newsletter. On the customer page, go to the Newsletter section, check the Subscribed to Newsletter option at the top of the Newsletter Information section and Save a Customer.
However, we really don’t recommend you to subscribe your customers to the newsletter yourself. If you really want to establish a great relationship with your customers, it’s better to let them subscribe on their own.
Moreover, if some of the customers you subscribed yourself come to your website, they may leave without understanding why they received the newsletter. This could even increase your bounce rates.
It’s better to let people subscribe to your newsletter willingly.
So that’s it. Now you know how to configure newsletters and subscribers in Magento 2 store which will help you establish strong relationships with your customers.
In this way, we have learned all the information about the newsletter.