

In this article, we are going to learn creation of custom table in magento2. But before that if you have not learned and understood following two things, then I recommend to go through those first.
Are you clear with first two links concepts. Hope you have created that module while reading.
We are going to continue building this module..so if you have not created yet then go and complete it quickly.
STEPS TO CREATE A CUSTOM DATABASE TABLE:-
- Step 1 : Add setup_version=”1.0.1″ in module.xml
- Step 2 : Create Database Table for custom module
- Step 3 : Insert Data in the Table
Step 1 : Add setup_version=”1.0.1″ in module.xml
It is necessary to create etc folder and add the module.xml file in it
app/code/Thecoachsmb/Mymodule/etc/module.xml
Contents would be:
<?xml version="1.0"?>
<config xmlns:xsi="http://www.w3.org/2001/XMLSchema-instance" xsi:noNamespaceSchemaLocation="urn:magento:framework:Module/etc/module.xsd">
<module name="Thecoachsmb_Mymodule" setup_version="1.0.1">
     <sequence>
         <module name="Magento_Directory"/>
         <module name="Magento_Config"/>
     </sequence>
 </module>
</config>
Step 2 : Create Database Table for custom module:-
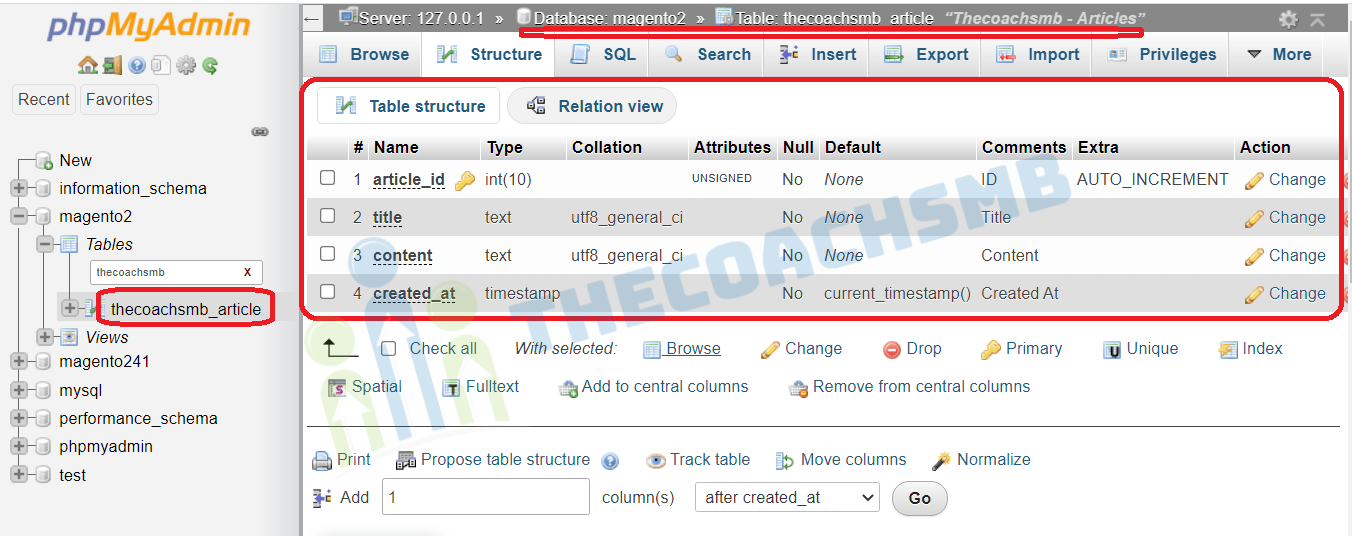
Now we need to create the database table which holds our articles data. I will create a table thecoachsmb_article and take the following columns:
article_id– the post unique identifiertitle– the title of the postcontent– the content of the postcreated_at– the date created of the post
The following is the schema for the table we want to create:
| Field | Type | Null | Key | Default |
|---|---|---|---|---|
| article_id | int(10) unsigned | NO | PRI | NULL |
| title | text | NO | NULL | |
| content | text | NO | NULL | |
| created_at | timestamp | NO | CURRENT_TIMESTAMP |
To achieve this, we need to create InstallSchema class, which is responsible for managing the installation of our schema. The file is located at app/code/Thecoachsmb/Mymodule/Setup/InstallSchema.php and has the following content:
<?php

namespace Thecoachsmb\Mymodule\Setup;

use \Magento\Framework\Setup\InstallSchemaInterface;
use \Magento\Framework\Setup\ModuleContextInterface;
use \Magento\Framework\Setup\SchemaSetupInterface;
use \Magento\Framework\DB\Ddl\Table;

/**
 * Class InstallSchema
 *
 * @package Thecoachsmb\Mymodule\Setup
 */
class InstallSchema implements InstallSchemaInterface
{
    /**
     * Install Articles table
     *
     * @param SchemaSetupInterface $setup
     * @param ModuleContextInterface $context
     */
    public function install(SchemaSetupInterface $setup, ModuleContextInterface $context)
    {
        $setup->startSetup();

        $tableName = $setup->getTable('thecoachsmb_article');

        if ($setup->getConnection()->isTableExists($tableName) != true) {
            $table = $setup->getConnection()
                ->newTable($tableName)
                ->addColumn(
                    'article_id',
                    Table::TYPE_INTEGER,
                    null,
                    [
                        'identity' => true,
                        'unsigned' => true,
                        'nullable' => false,
                        'primary' => true
                    ],
                    'ID'
                )
                ->addColumn(
                    'title',
                    Table::TYPE_TEXT,
                    255,
                    ['nullable' => false],
                    'Title'
                )
                ->addColumn(
                    'content',
                    Table::TYPE_TEXT,
                    null,
                    ['nullable' => false],
                    'Content'
                )
                ->addColumn(
                    'created_at',
                    Table::TYPE_TIMESTAMP,
                    null,
                    ['nullable' => false, 'default' => Table::TIMESTAMP_INIT],
                    'Created At'
                )
                ->setComment('Thecoachsmb - Article');
            $setup->getConnection()->createTable($table);
        }

        $setup->endSetup();
    }
}
Save the file.
This file is simply creating the table with the specified columns.
In which:
- $setup-> startSetup (): start setup
- $setup-> endSetup (): end setup
- $conn: create a connection to the database
- $tableName: create table name
- addColumn (): there are 4 parameters; name is column name, type is data type (int, smallint, text, varchar, float …), size is data length, options are array values (primary key, empty or not …)
Example for options: [‘identity’=>true,’unsigned’=>true,’nullable’=>false,’primary’=>true].
- identity => true: key
- unsigned => true: the key is not negative
- nulladble => false: not null
- primary => true: primary key
- default => ”: default data
From a terminal, run the following command:
php bin/magento setup:upgrade && php bin/magento setup:static-content:deploy -f && php bin/magento c:fNow lets check if the table has really been created.
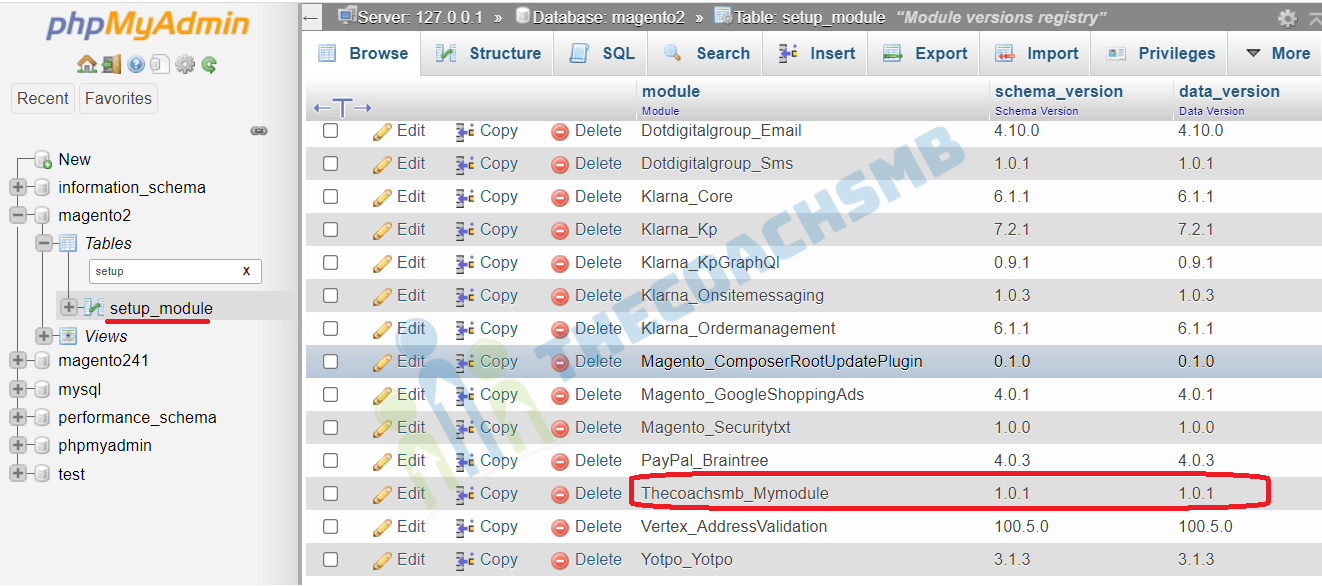
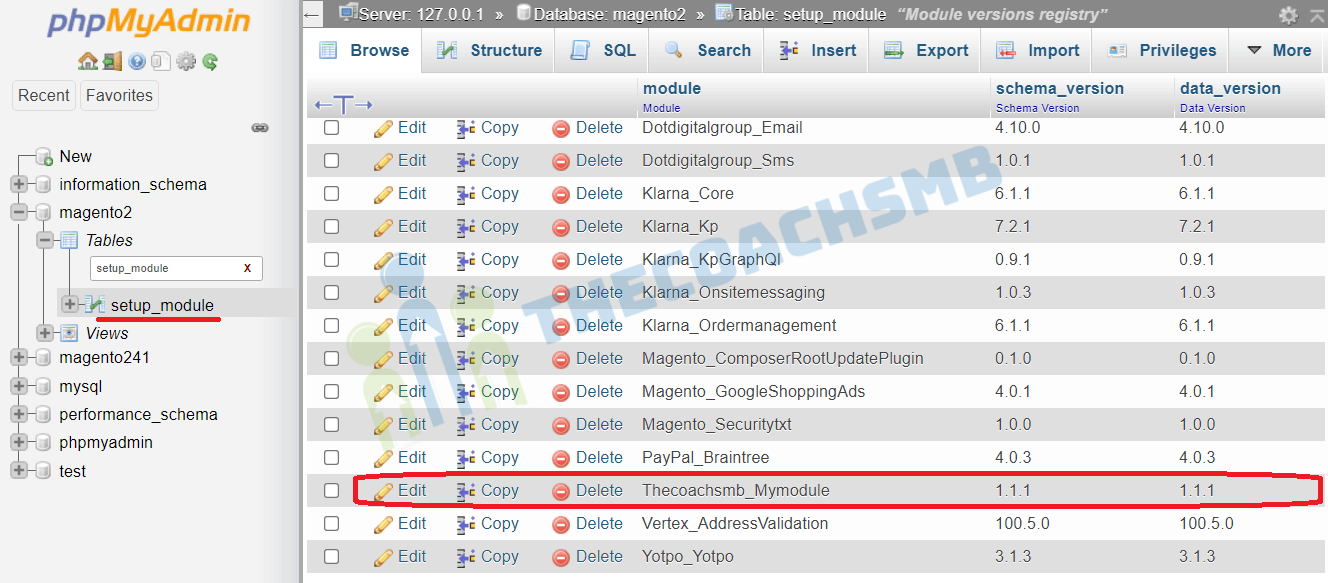
And at the setup_module table, now there’s a reference to our module, its schema, and data version:
Step 3 : Insert Data in the Table:-
Let’s add some articles to that table through an upgrade. To show you how to do that, go to create our app/code/Thecoachsmb/Mymodule/Setup/InstallData.php file, which is responsible for the data (not schema) migrations:
<?php

namespace Thecoachsmb\Mymodule\Setup;
use Magento\Framework\Setup\InstallDataInterface;
use Magento\Framework\Setup\ModuleContextInterface;
use Magento\Framework\Setup\ModuleDataSetupInterface;

/**
 * Class InstallData
 *
 * @package Thecoachsmb\Mymodule\Setup
 */
class InstallData implements InstallDataInterface
{
    /**
     * Creates sample articles
     *
     * @param ModuleDataSetupInterface $setup
     * @param ModuleContextInterface $context
     * @return void
     */
    public function install(ModuleDataSetupInterface $setup, ModuleContextInterface $context)
    {
        $setup->startSetup();
        $conn = $setup->getConnection();
        $tableName = $setup->getTable('thecoachsmb_article');

            $data = [
                [
                    'title' => 'How to create table in Magento2',
                    'content' => 'Content of the first post.',
                ],
                [
                    'title' => 'How to insert data in table of Magento2',
                    'content' => 'Content of the second post.',
                ],
            ];
           $conn->insertMultiple($tableName, $data);
           $setup->endSetup(); } }
Step 4. Adding some more data in Table
Let’s add some articles to that table through an upgrade. To show you how to do that, go to app/code/Thecoachsmb/Mymodule/etc/module.xmland update setup_version in it.
<?xml version="1.0"?>
<config xmlns:xsi="http://www.w3.org/2001/XMLSchema-instance" xsi:noNamespaceSchemaLocation="urn:magento:framework:Module/etc/module.xsd">
<module name="Thecoachsmb_Mymodule" setup_version="1.1.1">
     <sequence>
         <module name="Magento_Directory"/>
         <module name="Magento_Config"/>
     </sequence>
 </module>
</config>
Now we create our app/code/Thecoachsmb/Mymodule/Setup/UpgradeData.php file, which is responsible for the data (not schema) migrations:
<?php

namespace Thecoachsmb\Mymodule\Setup;

use \Magento\Framework\Setup\UpgradeDataInterface;
use \Magento\Framework\Setup\ModuleContextInterface;
use \Magento\Framework\Setup\ModuleDataSetupInterface;

/**
 * Class UpgradeData
 *
 * @package Thecoachsmb\Mymodule\Setup
 */
class UpgradeData implements UpgradeDataInterface
{

    /**
     * Creates sample articles
     *
     * @param ModuleDataSetupInterface $setup
     * @param ModuleContextInterface $context
     * @return void
     */
    public function upgrade(ModuleDataSetupInterface $setup, ModuleContextInterface $context)
    {
        $setup->startSetup();

        if ($context->getVersion()
            && version_compare($context->getVersion(), '1.1.1') < 0
        ) {
            $tableName = $setup->getTable('thecoachsmb_article');

            $data = [
                [
                    'title' => 'How to create table in Magento2',
                    'content' => 'Content of the first post.',
                ],
                [
                    'title' => 'How to insert data in table of Magento2',
                    'content' => 'Content of the second post.',
                ],
            ];

            $setup
                ->getConnection()
                ->insertMultiple($tableName, $data);
        }

        $setup->endSetup();
    }
}
Lets understand what is written in this file.
You can see that it is very similar to our Install class. The only difference is that it implements an UpgradeDataInterface instead of InstallSchemaInterface, and the main method is called upgrade. With this method, you check for the current module’s installed version and, when smaller than yours, fire up the changes you need to get done.
        if ($context->getVersion()
            && version_compare($context->getVersion(), '1.1.1') < 0
        ) {
The $context->getVersion() call will return 1.1.1 when the setup:upgrade CLI command is called for the first time. Then the sample data is loaded to the database, and our version is bumped to 1.1.1. To get this running, go ahead and fire a setup:upgrade:
php bin/magento setup:upgrade && php bin/magento setup:static-content:deploy -f && php bin/magento c:f
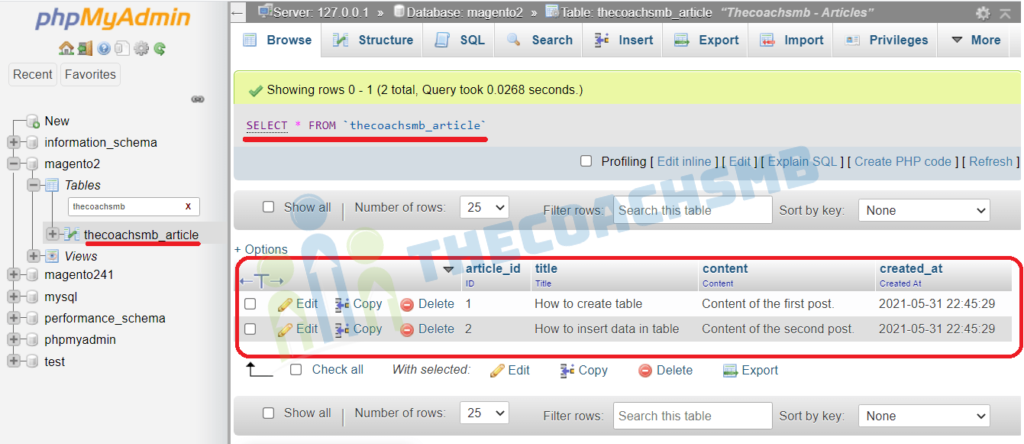
And then check the results at the thecoachsmb_article table:
And at the setup_module table:
In this way, we can create table and insert data in the Magento2.
Watch the video for more details.
Do let us know the feedback of this article by commenting below.
Happy Learning !!
Thank You !!